Showing posts with label tutorial. Show all posts

Tuesday, May 22, 2012

Hello! my name is Erin and I blog over at ekatearcher {everything from knitting to water colors}

Today I am going to go through step by step how to knit a professional & double warm brim.


1. You don't need anything special for this brim, just yarn & suitable sized 16" circular needle. (Here I'm using caron simply soft & size 7 US neelde)

2. Cast on however much you normally use for hats.  (For example, I casted on 80)

3. Begin knitting ribbing...(I'm using 2x2 ribbing, but you could easily use 1x1, 2x3, ets.)

4. ...Until your brim is twice as long as you want it to be. (For example if you want your brim to be 1.5" tall knit for 3".)

5. Here's the tricky part; fold up your ribbing so that the wrong sides are touching. (Make sure you match up the ribs!)

6. Insert your right hand needle into the first stitch on the left hand needle.  (Don't pull through.)  Then insert the right hand needle into the folded up part of the brim.

7. Yarn over & pull through as normal.  Then repeat for the stitch on the needle.

8. See how pretty the edge is.

9. Continue all the way around.

I love to use this brim for all sorts of hats, it looks pretty & polished!


Thursday, February 23, 2012

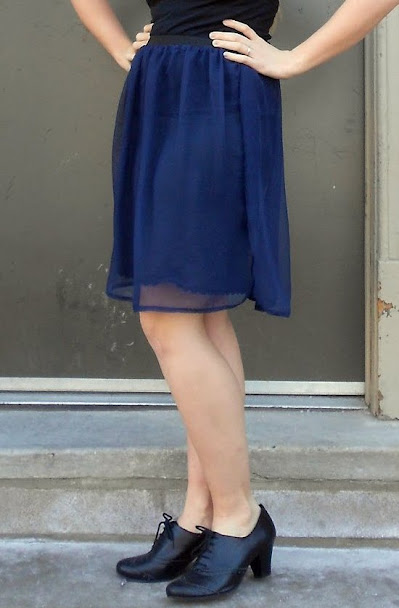
DIY: Transparent Skirt


There is a new trend for the spring that I actually like a lot and it's the transparent garment.  I don't want to spend money on something I'm not too sure of and that might just be trendy for all of a minuet so I decided to make my own transparent skirt.  Since I'm short I decided to make a knee length version.


This tutorial is pretty easy and you just need a few sewing skills.  As sewing skills go you need to be able to sew a straightish seam and now how to sew fabric to elastic using a zig zag stitch.  This is a pretty easy skirt to make and you probably wouldn't have too much trouble if you haven't sewn fabric to elastic before.


Materials:
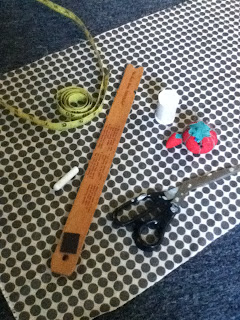
-1 Yard 45"or 60" (the width of your fabric is going to determine the length of your skirt) of transparent fabric.
-Wide Elastic (1 1/2"-2"), enough to go around your waist plus one inch.
-Thread that matches the color of your fabric
-pins
-sewing machine with zig zag stitch

First you will need to measure your waist or where you want your skirt to sit on your body.  Add one inch to this measurement.  This new number is the measurement for the elastic.  Cut you elastic to this length.


Next you will sew your elastic together with 1/2 and inch of seam allowance.  Your waist band is now
complete.


Now to work on the skirt. fold you fabric in 1/2 lengthwise.  Cut along the fold.  This is the front and back pieces of your skirt.  (My fabric was 45" and I bought a yard so after I cut my fabric in half I had two 22" wide x 36" long pieces.)
Note: You will want you skirt fabric to be about twice as long as your waist band.  Since my waist band was 28" I cut 6" off both of my skirt pieces.  The total circumference of my skirt is about 60"


Pin and sew the two side seams together.  I highly suggest using your favorite seam finishing technique as this fabric is prone to fraying.

Hem your skirt I suggest a baby hem, but any old hem will do.


Now the tricky part, it's time to attach your skirt to the waist band.  Pin the skirt to the top of the waist band as evenly as possible.  I lined one of my side seams up with the seam on my waist band.  It will look something like this.


Using the zig zag stitch on your sewing machine sew the skirt fabric to the elastic while stretching the elastic till the fabric lays flat.

It should look similar to this once sewn in place
Turn your elastic right side out and voila! A fab, trendy sheer skirt.  I wore mine with a black slip, but you can style this skirt a bunch of different ways.  Try a colored slip or even a fun floral skirt or a mini skirt, you can style this skirt in so many ways.

Thursday, December 22, 2011

Day 10: Quick Yarn Embelished Picture Frames

These frames are easy and quick to make.  They are perfect for a last minuet gift and take only a few materials and only a few minuets to complete.

Materials
Frames (mine are some wooden frames from Ikea that I painted earlier)
Yarn (I had some recycled sari silk sitting around that I wanted to use up)
Scissors
Hot Glue Gun

While your hot glue gun is heating up cut your yarn in the appropriate length and play around with the layout of the yarn on the frame. 

Once you find a layout you like best glue the yarn to the back of the frame.  Be careful not to block where the picture goes so that you can close up your frame. 

Continue gluing your yarn to your frame until you have used all your cuts of yarn or are satisfied with the overall look of the frame

Insert a fun and meaningful picture and you are set!  I chose one of my brother and me at my wedding.


Tuesday, December 20, 2011

Day 8: A Project Bag for a Knitter

I have a lot of friends who knit, and every holiday season we have a Pollyanna and go out to dinner.  We usually wait till the new year, but I am getting a head start on my gift with this great project bag.  Here are the instructions so you can make one for the knitter or crocheter in your circle. 

Materials and Equipment
1/3 yard 45 inch fabric
1 yard cord or ribbon for drawstring
Thread
Chalk
Pins
Scissors
Sewing machine
Iron

First and mark your fabric for cutting your main piece.  You want your piece of fabric to be 12 1/2 inches by 22 inches.

Once your piece is cut give is a good pressing and fold it in half width way.  (Or hamberger way if you ever had a kindergarten teacher like mine.)

On the folded edge mark 1 1/2 inches in and over to form a square.  Do this on both corners of the folded edge.

Cut these square bits of and set aside your main bag piece

Now with the remaining fabric cut a piece of fabric that is 10 1/2 inches by 12 1/2 inches.  Fold this piece of fabric in half so that the right sides are touching.  Pin along the edge and sew into a 5 inch by 12 1/2 inch tube.

Turn the 5 by 12 1/2" piece right side out and press so that the seam is at the bottom of the piece.  This is your pocket piece.

Pin your pocket piece to the right side of your main bag piece making sure that there is a 3/4 inch space between the pocket and the cut out corners.  Top stitch along the bottom and up the middle of your pocket piece.  use a zig zag stitch to attach it to the sides of the main fabric piece.

Lay your main bag piece with right sides facing and pin your side seams together leaving about 1 1/2 inches open at the top of the bag.  Sew two straight side seams.  Press your seams open.

With a straight stitch sew your seam allowance at the top of your bag down on either side.

When you have done this it will look like the picture above.  This is where your drawstring will hang out of the casing.

Give the top edge of your bag a quick zig zag stitch on either side to prevent fraying and fold it over and press.

Sew the casing for the drawstring with a straight stitch.

Pin the side edge of the cut out sections to the bottom of the bag.  When you pin them they will look like this. This is how you will get a box bottom on your project bag.

Here is the bag all sewn up standing mostly by itself with its two pockets in the front.

Next feed the cord threw the drawstring casings with a safety pin and tie the ends.  There you have it a project bag perfect for socks or a hat or whatever you want to carry along.  Put some yummy yarn and new needles inside for a great gift for a knitter. 

Monday, December 19, 2011

Day 7: Yarn Covered Bangles with Alli from OPB


Hello, Blue Betty readers!  Today I'd like to share a quick and easy tutorial that makes a great gift.  Plus, it's the perfect way to use up extra scraps of yarn.  I hope you like it!

bangles title
small

What you'll need: a bangle blank (pick one up at the craft store, or use an old bangle that needs a facelift), yarn, hot glue gun.
bangles 1
small

Step 1: secure the yarn to the inside of the bangle with a spot of hot glue.  Begin wrapping, being sure that there's no space between the loops.
bangles 2
small 

Step 2: continue wrapping, adding a spot of glue to the inside every quarter or half inch.  Be careful not to burn yourself - pull the yarn across the glue, instead of pressing it with your fingers. You can either make your bracelet a solid color, or add stripes by changing yarns.
bangles 3
small

That's all there is to it - enjoy your new bracelets!
bangles 4 small

Thank you for having me, Amanda, and happy holidays, everyone!  Stop by and see me sometime at One Pearl Button!

Thursday, November 10, 2011

Obi Belt Tutorial

 I made this belt for my purple shift dress.  It was super easy and added that extra something to that dress that I thought I would share how I made this belt.  It's not a true obi belt, but that was my inspiration to this project. 
Materials:
*About a 1/2 a yard of a woven fabric (My green belt was duponi silk and the one I made for the tutorial is a heavy quilting cotton.)
* Thread
*Interfacing (If using a light weight fabric I suggest using a fusible interfacing for the middle section of the belt, but If you are using a heavier fabric the interfacing isn't necessary.)


Tools:
*Measuring Tape
*Ruler
*Chalk
*Scissors
*Pins
*Sewing Machine

Step One
Measure your fabric length and split that into thirds.  If you want a wider belt you will need a longer piece of fabric.  My green belt is about 3 1/2 inches wide so my thirds were all about 8 inches wide.  The fabric I am using for this belt is only 16 inches long so I will be splitting it into 5 inch sections
Use your chalk and ruler to mark your fabric.

(If you are using interfacing you will want to cut a piece out that is the same length and width as one of the thirds of fabric)


 Step Two
Cut your fabric into thirds and attach interfacing to one of the strips, this piece will be your middle section of the belt.
Pin the ends of the belt and sew a seam with about 1/2 an inch seam allowence.


Press seams open.


Step Three
Fold your belt in half with right sides facing and pin.  Sew the end and side seam of the belt leaving one end open.


Turn the fabric tube right side out and press.


Step Four
Fold unfinished edges of the open end in and pin.


Top stitch around the edge of the entire belt leaving about a 1/8 to 1/4 of an inch edge.


There you have it a quick sash or obi belt.


Because of the belts length you can tie it a bunch of different ways.  Wrap it around as many times as you can and tie a small knot.  Wrap it around twice and tie a dramatic bow at the front.