Showing posts with label diy. Show all posts

Friday, October 12, 2012

October Link Love

Link Love is back!  I've missed doing this type of post, I love sharing my favorite DIY and recipes that I find around the internets.  So with out further ado, here are some great posts from the past few weeks from some of my favorite blogs and websites. 

Burda Style
1. Want to try out the peplum trend?  Learn how to refashion and old top or dress into a flouncy peplum over on Burda Style's blog. 

Good Knits
2. Need that certain something for your Halloween costume, or just want to have fun pretending to be a masked crusader?  Then get your crochet hooks read because over on Good Knits there is a free pattern for  simple mask

Cup of Jo
3. Brussel sprouts are one of my favorite fall and winter veggies and I keep seeing them at the farmers markets and whole foods.  I usually make mine with garlic and balsamic vinegar, but I am excited to try Jo's Best Brussel Sprouts You'll Ever Have.

A Pair and a Spare
4. I love elbow patches and what could make them any better? Sequins patches!  

Delightfully Tacky
5. And what fall day isn't complete without a good hardy soup?  Delightfully tacky has a yummy recipe for Thick Tomato Soup.  I will be making this very soon. 

Thursday, February 23, 2012

DIY: Transparent Skirt


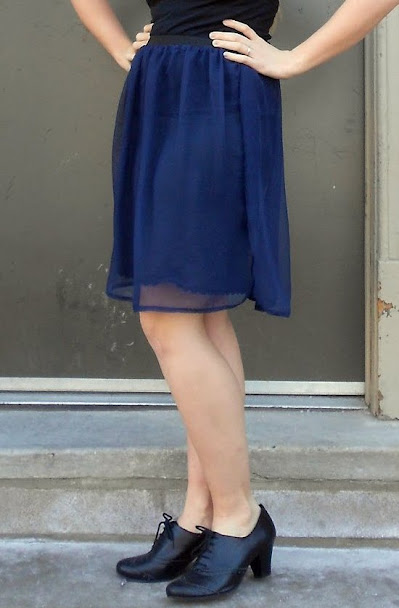
There is a new trend for the spring that I actually like a lot and it's the transparent garment.  I don't want to spend money on something I'm not too sure of and that might just be trendy for all of a minuet so I decided to make my own transparent skirt.  Since I'm short I decided to make a knee length version.


This tutorial is pretty easy and you just need a few sewing skills.  As sewing skills go you need to be able to sew a straightish seam and now how to sew fabric to elastic using a zig zag stitch.  This is a pretty easy skirt to make and you probably wouldn't have too much trouble if you haven't sewn fabric to elastic before.


Materials:
-1 Yard 45"or 60" (the width of your fabric is going to determine the length of your skirt) of transparent fabric.
-Wide Elastic (1 1/2"-2"), enough to go around your waist plus one inch.
-Thread that matches the color of your fabric
-pins
-sewing machine with zig zag stitch

First you will need to measure your waist or where you want your skirt to sit on your body.  Add one inch to this measurement.  This new number is the measurement for the elastic.  Cut you elastic to this length.


Next you will sew your elastic together with 1/2 and inch of seam allowance.  Your waist band is now
complete.


Now to work on the skirt. fold you fabric in 1/2 lengthwise.  Cut along the fold.  This is the front and back pieces of your skirt.  (My fabric was 45" and I bought a yard so after I cut my fabric in half I had two 22" wide x 36" long pieces.)
Note: You will want you skirt fabric to be about twice as long as your waist band.  Since my waist band was 28" I cut 6" off both of my skirt pieces.  The total circumference of my skirt is about 60"


Pin and sew the two side seams together.  I highly suggest using your favorite seam finishing technique as this fabric is prone to fraying.

Hem your skirt I suggest a baby hem, but any old hem will do.


Now the tricky part, it's time to attach your skirt to the waist band.  Pin the skirt to the top of the waist band as evenly as possible.  I lined one of my side seams up with the seam on my waist band.  It will look something like this.


Using the zig zag stitch on your sewing machine sew the skirt fabric to the elastic while stretching the elastic till the fabric lays flat.

It should look similar to this once sewn in place
Turn your elastic right side out and voila! A fab, trendy sheer skirt.  I wore mine with a black slip, but you can style this skirt a bunch of different ways.  Try a colored slip or even a fun floral skirt or a mini skirt, you can style this skirt in so many ways.

Friday, January 20, 2012

Link Love

It's time for January's link love and I've got ton's of great things I've found around the web.

You Can Have Underwear That Fits!
1.) Burda Style has a great blog post about sewing vintage undies.

How to Make a Mounted Jackalope 
2.) Learn how to turn a thrifted fur coat into a mounted jackalope over on Offbeat Home.

Floral Applique
3.) Over on Coletterie you can read up on how to spice up a garment with some Floral Applique.

5-Minute Heart
4.) Get ready for Valentines Day over on Good Knits and learn how to crochet a heart in 5 minuets. 

Delightfully Tacky: Tortilla Soup
5.) With winter finally here in the city it's time to warm up with some yummy soup.  I'm going to try this yummy recipe from Delightfully Tacky

Hand Chopped Pesto
6.) Along the same lines as soup how about some hand chopped pesto cutesy of the Etsy Blog

Thursday, December 29, 2011

Thursday, December 22, 2011

Day 10: Quick Yarn Embelished Picture Frames

These frames are easy and quick to make.  They are perfect for a last minuet gift and take only a few materials and only a few minuets to complete.

Materials
Frames (mine are some wooden frames from Ikea that I painted earlier)
Yarn (I had some recycled sari silk sitting around that I wanted to use up)
Scissors
Hot Glue Gun

While your hot glue gun is heating up cut your yarn in the appropriate length and play around with the layout of the yarn on the frame. 

Once you find a layout you like best glue the yarn to the back of the frame.  Be careful not to block where the picture goes so that you can close up your frame. 

Continue gluing your yarn to your frame until you have used all your cuts of yarn or are satisfied with the overall look of the frame

Insert a fun and meaningful picture and you are set!  I chose one of my brother and me at my wedding.


Friday, December 16, 2011

Day 4: Christmas Link Love

For the last few weeks I have been scouring my favorite blogs for great holiday tutorials that would make great last minuet gifts or a lovely handmade stocking stuffer.  I am really excited about all of these links and absolutely love all of these ideas. 

1. Make a special holiday cocktail with Delightfully Tacky's Peppermint Vodka Tutorial

Delightfully Tacky, Peppermint Vodka
2. Over on Good Knits, learn how to make cute winter hat ornaments with Kate from Otillie's Closet.

Good Knits, Winter Hat Ornaments

3. Alli on One Pearl Button has a great tutorial on sewing a quick little gift bag.

OPB, Sweet and Simple Gift Pouch
4. Need a cozy gift for a friend?  Try making a Cowl Neck Scarf with Zoe over on So Zoe...What Do You Know?

So Zoe..., Cowl Neck Scarf
5. Burda Style has a tutorial for Ruffle Cuffs.  They look easy enough to make and you can style them any way you want.

Burda Style, Ruffle Cuffs
6. I am planing on making these yummy Cardamom Sugar Cookies from over on the Etsy Blog this weekend.

Etsy Blog, Cardamom Sugar Cookies

Thursday, December 15, 2011

Day 3: Easy As Pie Tam Knitting Pattern


 This knitting pattern is for a simple and quick tam or beret.  What I love about this pattern is that it works up quickly and you can make it in almost any fiber just make sure that the fiber you choose has enough memory or spring for the brim of the hat.  I like a wool silk blend, or a blended Angora for extra warmth and luxury. 

Materials:
120 Yard of a Worsted Weight Yarn
Us 8 16 inch Circular Needles
US 8 DPNs
Stitch Marker

Gauge:
About 4 sts to the inch in stockinette on US 8 needles, Aggressively Blocked

CO 80 sts
Place Marker and join work being careful not to twist cast on edge.
Work in 2x2 rib for about 1-11/2 inches.

Increases:
R1: Knit 10 M1, repeat this to marker
R2: Knit All
R3: Knit 11, M1, repeat this to marker
R4: Knit All
R5: K12, M1, repeat this to marker

Knit even till the hat measures about 4 inches from the cast on edge.  (If you would like your tam to have more room in or be a bit more floppy knit even till you have 5 to 6 inches from the cast on edge.)

Decreases
R1: K11, K2tog, Repeat this to marker
R2: Knit All
R3: K10, K2tog, Repeat this to marker
R4: Knit All
R5: K9, K2tog, Repeat this to marker
R6: Knit All
R7: K8, K2tog, Repeat this to marker
R8: Knit All
R9: K7, K2tog, Repeat this to marker
R10 Knit All
R11: K6, K2tog, Repeat this to marker
R12 Knit All
R13: K5, k2tog, Repeat this to marker
R14: Knit All (Switch To DPNs)
R15: K4, K2tog, Repeat this to marker
R16: Knit all
R17: K3, K2tog, Repeat this to marker
R18: Knit All
R19: K2, K2tog, Repeat this to marker
R20: K1, K2tog, Repeat this to marker
R21: K2tog, Repeat this to marker
R22: K2tog, Repeat this to marker

Work I-cord for 2 rows.
Bind Off
Weave in ends

To get the desired Tam shape you will need to aggressively wet block your tam on a plate.

Wednesday, December 14, 2011

Day 2: Makeing a Mobius Cowl


Everyone loves a handmade gift, and who wouldn't like an excuse to buy a half a yard of that wool cashmere blend in cream from your favorite fabric store.  Here is a quick, and simple gift to make to bring a bit of warmth and luxury to someone special (and yourself because 1/2 a yard makes two). 


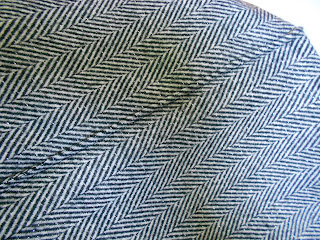
I found these wool blends at my favorite fabric store.  The Picture doesn't do it justice, but the black and white has silver threads running through it, giving it just a little bit of sparkle.


Materials
1/2 a yard of a wool or wool blend woven, about 60 inches wide
Matching thread
Pins
Sewing Machine

1. Cut the fabric in half so that you have two 30 inch pieces of fabric.  

Folded in half lengthwise
 2. Fold in half lengthwise with right sides facing each other.  Pin and sew leaving about 1/2 inch seam allowance.  If your fabric is prone to fraying you may want to zig zag along the seam allowance.


 3. Turn right side out.  You know have a tube that is about 30" long.  Fold one end of the tube in on it's self about 1/2" to 3/4" and pin in place.  

Folding the edge down
 4.  Now take the other end and twist it 180 degrees, and insert the raw end into the end with the folded edges.  Your edge with the seam shouldn't match up it they do you either haven't twisted it or you have twisted too much. Pin these two edges together and sew a seam about 1/4 inch from the fold.  

You can barely see it, but there's a seam in there somewhere. 

5. Clip your ends and wrap or wear.  (Like I said you can make two with 1/2 a yard of 60 inch fabric.)


Thursday, November 10, 2011

Obi Belt Tutorial

 I made this belt for my purple shift dress.  It was super easy and added that extra something to that dress that I thought I would share how I made this belt.  It's not a true obi belt, but that was my inspiration to this project. 
Materials:
*About a 1/2 a yard of a woven fabric (My green belt was duponi silk and the one I made for the tutorial is a heavy quilting cotton.)
* Thread
*Interfacing (If using a light weight fabric I suggest using a fusible interfacing for the middle section of the belt, but If you are using a heavier fabric the interfacing isn't necessary.)


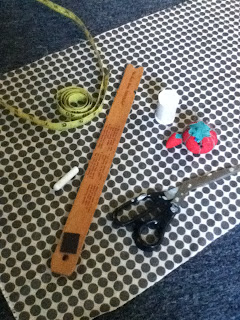
Tools:
*Measuring Tape
*Ruler
*Chalk
*Scissors
*Pins
*Sewing Machine

Step One
Measure your fabric length and split that into thirds.  If you want a wider belt you will need a longer piece of fabric.  My green belt is about 3 1/2 inches wide so my thirds were all about 8 inches wide.  The fabric I am using for this belt is only 16 inches long so I will be splitting it into 5 inch sections
Use your chalk and ruler to mark your fabric.

(If you are using interfacing you will want to cut a piece out that is the same length and width as one of the thirds of fabric)


 Step Two
Cut your fabric into thirds and attach interfacing to one of the strips, this piece will be your middle section of the belt.
Pin the ends of the belt and sew a seam with about 1/2 an inch seam allowence.


Press seams open.


Step Three
Fold your belt in half with right sides facing and pin.  Sew the end and side seam of the belt leaving one end open.


Turn the fabric tube right side out and press.


Step Four
Fold unfinished edges of the open end in and pin.


Top stitch around the edge of the entire belt leaving about a 1/8 to 1/4 of an inch edge.


There you have it a quick sash or obi belt.


Because of the belts length you can tie it a bunch of different ways.  Wrap it around as many times as you can and tie a small knot.  Wrap it around twice and tie a dramatic bow at the front.