Showing posts with label Lace. Show all posts

Friday, October 5, 2012

Stitch Guide: Old Shale II


Just like with feather and fan you can add a purl ridge into old shale.  This can add texture to your knit piece and can make the knitted fabric look very different.  This segment is short, but if you want more info on how purl ridges change the look of a knitted fabric check out my posts on Feather and Fan II and III.  A lot of the same principals apply to Old Shale; the stitch pattern is exactly the same as feather and fan you are only changing the method of increasing. 

Remember all our feather and fan and old shale stitch patterns are written for a multiple of 18 stitches.  

Old Shale With a Purl Ridge
Worked Flat
R1: *(K2tog) 3x, (M1, K1) 6x, (K2tog) 3x*
R2: Purl All Stitches
R3: Purl All Stitches
R4: Purl All Stitches

Worked in the Round
R1: *(K2tog) 3x, (M1, K1) 6x, (K2tog) 3x*
R2: Knit All Stitches
R3: Purl All Stitches
R4: Knit All Stitches


Old Shale, Old Shale II


Friday, September 7, 2012

Stitch Guide: Feather and Fan III


In our last installment of the feather and fan stitch we added a purl ridge to our stitch pattern.  Today we are going to add a purl ridge every 7th row.  This breaks up the pattern into an eight row repeat instead of a four row repeat, and gives the stitch pattern a whole new look.  Lets take a look at version II and Version III next to each other.
Version II on left, version III on right.
Spacing the purl ridge out over 8 rows instead of 4 gives the pattern a whole new look and feel.  There are more rows of stockinette between the purl ridge which makes the ripples look wider.  It also makes the swatch look longer because there is more space between each purl ridge.  The fabric created also has more drape than in version II which is constricted by the purl rows and has less stockinette.  

Now on to the stitch pattern.  Remember feather and fan is worked over a multiple of 18 stitches. 


Worked Flat
R1: *(K2tog) 3x, (YO, K1) 6x, (K2tog) 3x*
R2: Purl All Stitches
R3: Knit All Stitches
R4: Purl All Stitches
R5: Repeat Row 1
R6-R8: Purl All stitches

Worked in the Round
R1: *(K2tog) 3x, (YO, K1) 6x, (K2tog) 3x*
R2: Knit All Stitches
R3: Knit All Stitches
R4: Knit All Stitches
R5: Knit Row 1
R6: Knit all Stitches
R7: Purl all Stitches
R8: Knit all Stitches

Feather and Fan, Feather and Fan II, Feather and Fan III

Monday, August 27, 2012

My New Lovely


While at my parents last week I went to my favorite yarn shop in the Finger Lakes, Finger Lakes Fibers.  It's on the main street of a little town called Watkins Glen, which is located at the southern end of Seneca Lake.  This shop has some really beautiful items and I could spend hours looking at everything they've got, but I usually have an impatient Hubs with me so I look for the yarn that my LYS doesn't carry to find something special.

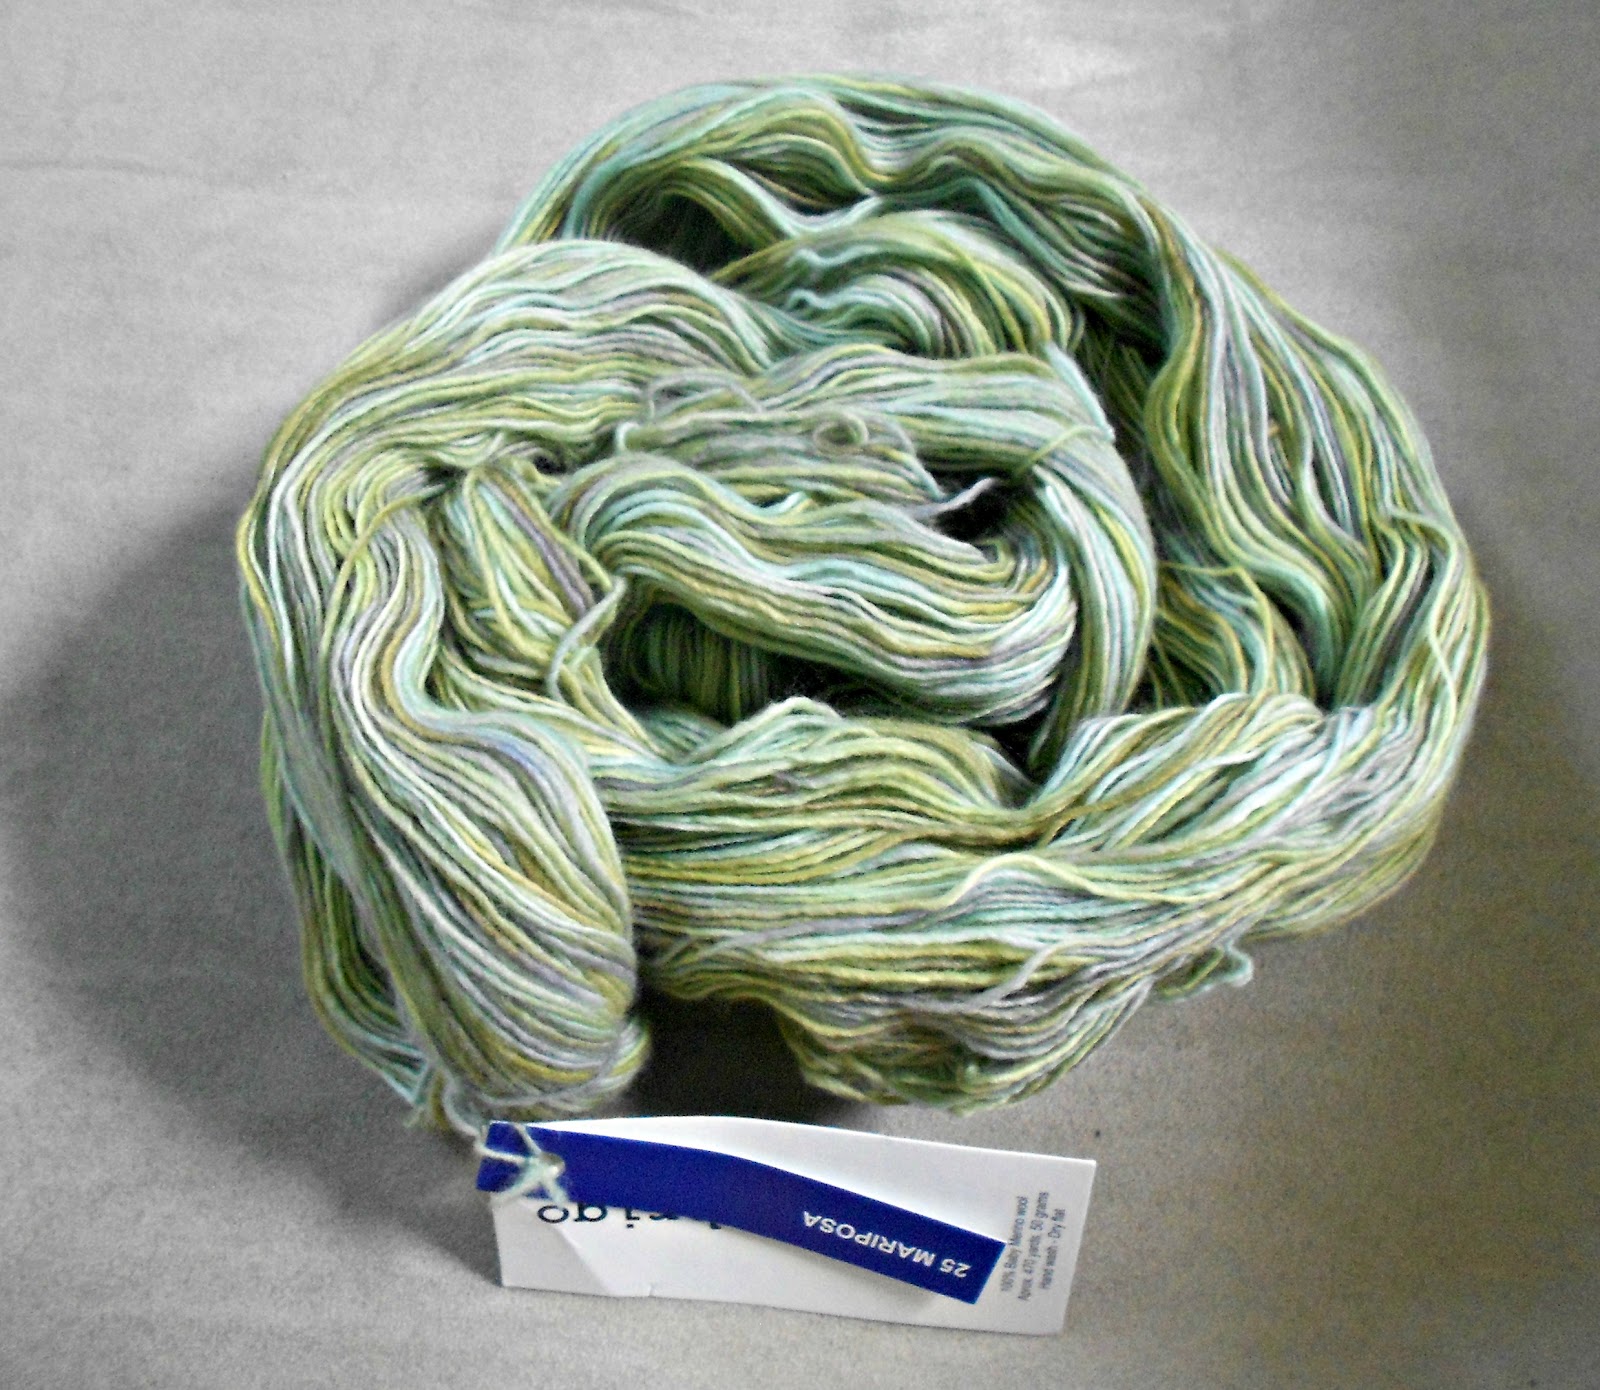
What I found was some lovely Malabrigo Lace.  I've heard many a knitter rave over how wonderful this yarn is, and while I can't say anything for the Lace weight (yet!) I do love their worsted weight single ply merino.  This is like the worsted weight's little sibling, it has the softest hand I've felt on a wool that isn't a cashmere blend and the dying is to dye for.  (Horrible pun intended!)


The color is right up my all with soft sea blues and greens some sandy taupe and drift wood brown.  I may be falling in love, and am starting to hatch a plan for my newest little lovely.


Friday, August 24, 2012

Stitch Guide: Feather and Fan II

There are many was to knit Feather and fan as well as many different variations on this lace stitch.  The one we will be discussing today has a purl ridge in the stitch pattern.  One small change can have a big impact on the look of the stitch and can gives that pattern a whole different feel.  Unlike the plain ol' feather and fan stitch this one has texture.  The purl ridge is accomplished by changing one row in the pattern.  The lace row is the same, it's the third row that changes.  

Note: Like previously mentioned all Feather and Fan stitch patterns are written for a multiple of 18 stitches


Feather and Fan with a Purl Ridge
Worked Flat
R1: *(K2tog) 3x, (YO, K1) 6x, (K2tog) 3x*
R2: Purl All Stitches
R3: Purl All Stitches
R4: Purl All Stitches

Worked in the Round
R1: *(K2tog) 3x, (YO, K1) 6x, (K2tog) 3x*
R2: Knit All Stitches
R3: Purl All Stitches
R4: Knit All Stitches

Other Feather and Fan posts:
Stitch Guide: Feather and Fan

Friday, August 10, 2012

Stitch Guide: Feather and Fan


Feather and Fan, it’s one of those old stand by knitting stitches, a great introduction to lace knitting, and it looks impressive with out making a knitters eyes go crosswise looking at charts.  Why is it that this lace stitch is the gate way drug of lace knitting?  Is it because of the easy to remember row repeat, or the simplicity of the decrease and increase, or is it because it only has one lace row and three “easy” rows?  Could it be that the increase and decreases are set up in such a manner that you can easily grasp the concept of how a lace stitch moves and is built?  Yes, it’s all of these reasons.  This stitch pattern is one of the first lace stitches that many knitters learn, because of its ease.  You can be a beginner and pick up this stitch with just a few projects under your belt and it will make your scarves, hats and anything else you make look like you labored for hours and hours with a difficult lace pattern.  (And lets be honest who doesn’t want their friends, family and perfect strangers oogling their hand knit items.)

In the next few installments of Stitch Guide here on Blue Betty we will be looking at Feather and Fan along with some of its variations.  Lets start with the skills a knitter needs to accomplish this stitch.  First off you need to know how to knit and purl, check.  Secondly you need to know how to decrease by knitting two stitches together (K2tog), knitting two together is as easy as it sounds instead of knitting one stitch you knit to at the same time decreasing from two stitches down to one.  Thirdly, you need to know how to increase with either a yarn over (YO) or by making one (M1). Yarn overs are accomplished by wrapping your yarn over your right hand needle.  That’s it, done, complete, you just increased one stitch.  Yarn overs make pretty eyelets in your knitting and are very feminine.  We will get back to make one (M1) in a few weeks.  

Feather and fan and all its variations are knit with a multiple of 18 stitches.  The feather and fan pattern can be worked in different multiples to fit your needs though, and makes this pattern vary versatile.  For example you could use a multiple of 12, your pattern row would have 4 decreases and 4 increases, but for the sake of simplicity all the stitch patterns written out here for the feather and fan stitch pattern family will be written for a multiple of 18. 

Good Ol’ Feather and Fan
Worked Flat
R1: *(K2tog) 3x, (YO, K1) 6x, (K2tog) 3x*
R2: Purl All Stitches
R3: Knit All Stitches
R4: Purl All Stitches

Worked in the Round
R1: *(K2tog) 3x, (YO, K1) 6x, (K2tog) 3x*
R2: Knit All Stitches
R3: Knit All Stitches
R4: Knit All Stitches

Monday, July 23, 2012

New Pattern: Fishermen's Net Shawl

My first shawl pattern is ready and released!  You can check it out in my Etsy Shop or over on Ravelry.  This shawl has been a long time in the making.  I knit a version of this last summer, but wasn't quite pleased with how it cam out.  After a few tweaks and a lot of charting I am excited and pleased with how this pattern has turned out.


This pattern uses about 400 yards of DK weight yarn and a US 8 needle.  While this is an easy lace pattern it is charted and the knitter should be familiar with basic increases and decreases as well as an applied I-cord bind off. 


Thursday, July 5, 2012

Stitch Guide: Razor Shell

I have a love for lace, but I find squinting over charts and 10+ row repeats a bit much.  My dad taught me a long time ago to KISS, or Keep It Simple, Stupid.  I have to say that this is some for the best advice my dad has given me along with check the oil in your car and how to write a good resume.  That being said what I love about this lace pattern is that it is simple, but has a huge visual impact.  There are only two rows to this stitch.  How easy is that to remember, especially when one of those rows is a resting row.  Even better.  Razor shell stitch has a right side and a wrong side and makes a great edging or detail for a cardigan or shawl.  I could even see this as a great stitch for a cowl in some yummy mohair.

Razor Shell Stitch (Worked Flat)
Multi of 8 stitches plus 1
R1: K1 *YO, K2, Sl 2 Kwise, K1, P2sso, K2, YO, K1*
R2: Purl all Sts

Razor Shell Stitch (Worked in the Round)
Multi of 8 stitches
R1:*YO, K2, Sl 2 Kwise, K1, P2sso, K2, YO, K1*
R2: Knit all Sts

Thursday, June 21, 2012

Stitch Guide: Fish Tail Lace

Fish tail lace is probably my favorite lace stitch of all times.  It is only a six row repeat.  Three of those six rows are all purls or all knits depending on if your working flat or in the round.  The pattern requires a multiple of eight stitches.  What is there not to love about this stitch patter.  Oh, ok it's not reversible, but other than than this is a great simple lace stitch that has a ton of impact.

Fish Tail Lace (Worked Flat)
Multi of 8 stitches plus 1

R1: K1 *YO, K2, Sl 2 Kwise, k1 p2sso, K2, YO, K1*
R2: Purl All Stitches
R3: K1 *K1, YO, K1, Sl 2 Kwise, k1 p2sso, K1, YO, K2*
R4: Purl All Stitches
R5: K1 *K2, YO, Sl 2 Kwise, k1, p2sso, YO, K3*
R6: Purl All Stitches


Fish Tail Lace (in the Round)
Multi of 8 stitches

R1: *YO, K2, Sl 2 Kwise, k1 passo, K2, YO, K1*
R2: Knit All
R3: *K1, YO, K1, Sl 2 Kwise, k1 passo, K1, YO, K2*
R4: Knit All
R5: *K2, YO, Sl 2 Kwise, k1, passo, YO, K3*
R6: Knit All

Thursday, May 17, 2012

Stitch Guide: Eyelet Ladder


Eyelet ladder is a fun and easy lace stitch that knits up with columns of left and right leaning eyelets.  This is a stitch pattern that is easy to memorize as it only has two lines of pattern.  However this stitch is not reversible so keep in mind when deciding to use this stitch.

Eyelet Ladder (Knit Flat)
Multi of 4 +2
R1: *K1, K2tog, YO, K1* K2
R2: Purl All Stitchs
R3: K1 *K2, YO, SSK* K1
R4: Purl All Stitches

Eyelet Ladder (Knit in the Round)
Multi of 4
R1: *K1, K2tog, YO, K1*
R2: Knit All Stitches
R3: *K2, YO, ssk*
R4: Knit All Stitches

Tuesday, May 8, 2012

Knitting Update

I have been knitting, crocheting and spinning my fingers to the bone.  Ok, maybe not to the bone, but I have been working on a lot of new projects.  Some are for designs and some are personal projects.  Here's what's on my needles, hook and bobbin this month. 

I'm working on my first ever lace design.  This is just a sample I'm knitting to make sure it's going to work out the way I want before I start knitting it with the yarn I have intended for the design.  The lace pattern is hard to see, but that's because it will need to be blocked aggressively.  

Here's a close up of the main lace stitch.  

I have completed my last Spring pattern for my shop.  Here's a super early, super sneaky peek.  I know it's just the button band, but what a button band it is.  I just finished typing up and formatting the pattern now I just need to shoot some photos and proof the written pattern.  I'm planing to release the new pattern on May 21st. 

I also am crocheting a doily blanket.  I've wanted to do this for such a long time that I finally gave in and just bought the yarn and picked a pattern off of Ravelry.  It's called the Double Pineapple Doily and I am in love.  

The yarn is Elle Rae's classic Heathers.  Its the same color as the walls in our living room.  It will look lovely on our sandy colored couch. 

I finally finished spinning my Loop Batt, now it's time to chain ply!

That's all that's new in the fiber world right now.  Tomorrow I am having a guest blogger with a super awesome tutorial, but you'll have to check back tomorrow to see who it is.  

Tuesday, May 1, 2012

Technique Tuesday: Life Line

Life lines, are well, a life saver.  If you are starting to dip your feet into the knitted lace ocean than I highly suggest knowing how to use a life line.  A life line allows you to rip back your work with out losing stitches.  They can provide a bit of piece of mind while you are knitting lace for the first time, or are knitting up a complicated lace pattern (like this one).
You will need a tapestry needle and some waste yarn.  I highly recomend using a yarn that will not catch or stick to the yarn  in your project.  Some mercerized cotton is usually a safe bet. 

Thread your needle and than slip the needle through the stitch of your work.  I like to do it on the live stitches because they are all lined up and easy to see.  I also like to install my life line before I work my purl row.  If you are using any stitch markers do not thread the life line through them. 

Here you can see my life line hanging out either end of my knitting.  This is what an life line looks like as you work.  Keep knitting your project.  Now here is where the life line becomes important.  Lets say you notice your stitch count was off, or that you have been doing the lace chart wrong.  Have no fear.  

Pull your work off your needle and start frogging you work.  I know it sounds scary, but I promise that the life line will keep you afloat.  

In this photo I have frogged back to my life line.  In all actuality I can't frog any farther unless I remove the life line.  The life line is acting like a large stitch holder holding all of my life stitches in place.  

Now you just pick the stitches back up with your needle and continue on your way.   I leave my life lines in till I have finished my project.  

Here you can see my sample bound off with the life line still in the work.  Easy peasy, just pull one end of the life line and it will slip right out. 

Ta Da!  Finished.  

Tuesday, April 24, 2012

What Came Out of the Dye Pot

I've been having so much fun with my new dyes that I felt that I should share my newest experiments in color and yarn.

I tried out my reds this weekend and came up with this summery color.  It reminds me of those cheer, orange, and grape Popsicles.  The ones that turn your whole mouth purple or red from all the food coloring.

Then there's this guy.  I am loving pretty much every color I mix using yellow.  How awesome is this neon green.  I wasn't sure if I would be able to achieve such an eye popping color, so I was pleasantly pleased when this came out of the dye bath.

When am I going to list these yummy hanks of lace weight in my Etsy shop?  Soon, very soon.  My big plan is to dye and then dye some more though May and have a huge shop update in June.  I'll keep teasing everyone by periodically posting what has just come out of the dye pot.

Monday, April 23, 2012

New Pattern: Tide Waters Tank

I have just released my newest knitting design, Tide Waters.  It's a knitters take on the corset, and because it's knit, it hugs your curves with out all the pinching.  Other than the shaping my other two favorite design element of this pattern are the lace panel and the I-cord edging at the neckline.

I started this design back in January.  The thought came to me one day at work, what would it look like to knit a corset.  Not a cinching corset, but a top that was comfortable that skimmed your curves and had the look of a corset with out all the boning and laces.

When I set out to design this pattern I looked at a lot of different types of corsets and how the were constructed.  Where was the boning placed and how much?  How drastic was the waist line decrease?  I even made a pintrest board of all my favorite corsets and designs.  This design process was new to me, and I soon realized that it helped me realize a few things about what I was going to design.

The design took a new direction than I thought it would.  I figured out that the construction of this top was going to be bottom up, with lots of waist and bust shaping and involve a bit of grafting.  This is so different from any of my previous designs and this type of construction, while not new to me, was different than I had originally intended.

The idea for the lace panel came toward the end of the sketching and swatching.  I thought the design needed a little umph.  A little lace in the front would do the trick, and it would be reminiscent of the decorative stomachers of the 1600-1700.  A happy accident followed and as I knit the sample the lace design shaped the fabric of the garment in such a way that it created a point at the hips and a subtle sweetheart neckline.

You can check out this pattern in my Etsy Shop under Tide Waters, or check it out on Ravelry.com just search Tide Waters in the pattern search.


P.S. The shorts in the photos are those purple shorts I sewed a few weeks ago.

Thursday, April 19, 2012

Stitch Guide: Left Leaning Mesh

Left leaning mesh is right leaning mesh's sibling.  This mesh has all the same characteristics of its sibling it just leans to the left instead of the right.

Left Leaning Mesh (Worked Flat)
Multi of 2 +1
R1: *SSK, YO* K1
R2: Purl all Sts

Left Leaning Mesh (Worked in the Round)
Multi of 2
R1: *SSK, YO*
R2: Knit all Sts

Thursday, April 5, 2012

Stitch Guide: Right Leaning Mesh

Right leaning mesh stitch has a natural bias to it.  This happens because of the combination of where yarn overs are placed and how the decreases lean.  This stitch makes for a very open fabric with lots of stretch and drape. It is relatively simple to knit and is easy to commit to memory.  This is a great stitch for market bags or a light and airy summer top.  Just keep in mind that your knitting will be biased.

Right Leaning Mesh (Knit Flat)
Multiple of 2 +1
R1: K1 *YO, K2tog*
R2: Purl all stitches


Right Leaning Mesh (Knit in the Round)
Multiple of 2
R1: *YO, K2tog*
R2: Purl all stitches

Thursday, March 22, 2012

Stitch Guide: Mrs. Hunter's Stitch


This is a fun stitch that can add a lot of interest to a field of knits.  It is said that this is a stitch that, that's right, Mrs. Hunter created.  Well whoever created this stitch it is one of my favorites.  This stitch isn't very elastic, and has a right and a wrong side, but it is good in items you don't need or want too much give.

Mrs. Hunter's Stitch (Knit Flat)
Multiple of 4 plus 2
R1: K all sts
R2: P all sts
R3: K1 *YO, Sl sts, K3, passo all 3 K sts* K1
R4: P all sts

Mrs. Hunter's Stitch (In the Round)
Multiple of 4
R1: K all sts
R2: K all sts
R3: *YO,  Sl sts, K3, passo all 3 K sts*
R4: K all sts

Thursday, February 16, 2012

Free Knitting Pattern: Lace Legs


Need something to warm up your legs when the temperatures drop, or do you miss wearing some of your favorite skirts or dresses because it's so chilly out.  Or are you like me and are longing for spring and just can't accept that its cold out and you need to wear pants.  Why not try knitting a pair of lace legwarmers in your favorite fiber to keep your gams toasty warm while you wear your favorite flirty skirt.

These are simple to knit only requiring the knitter to have basic lace knowledge, mainly yarn overs, and two stitch decrease.

Materials
3 balls of Knit Picks Stroll Sport Weight (137 yards, 75% superwash merino, 25% nylon) in Jackrabbit Heather
16 " US 4 Circular Needle
Stitch Marker
Tapestry Needle

Gauge
13sts x 14 rows = 2"x2"

Leg Warmers (Make Two)
CO 80 sts, place marker and join being careful not to twist cast on edge.
Work in 2x2 rib for 17 rows or about 21/2 inches
Knit 1 round
Start Fish Tail Lace

Fish Tail Lace
R1: *YO, K2, Sl 2 Kwise, k1 passo, K2, YO, K1*
R2: Knit All
R3: *K1, YO, K1, Sl 2 Kwise, k1 passo, K1, YO, K2*
R4: Knit All
R5: *K2, YO, Sl 2 Kwise, k1, passo, YO, K3*
R6: Knit All

Work Fish Tail Lace for 15 repeats
Knit 1 round
Work 2x2 rib for 17 rows or 2 1/2 inches
BO in Pattern
Weave in ends and block.


Abbreviations
K = Knit
YO = Yarn Over
Sl = Slip Stitch
Kwise = Knit Wise
Passo = Pass stitch or stitches over new stitch
CO = Cast On
BO = Bind Off

Friday, April 8, 2011

New Pattern Coming Soon


This square of knitted fabric is actually my new pattern folded up waiting to be worn for photos. The release is planed for Tuesday April 12th. Check back on Monday for a sneak peek of the new design.

Tuesday, March 22, 2011

Clapotis Variation: Eyelet Lace

A finished sample of the Clapotis Variation

I think that the Clapotis by Kate Gilbert is a great pattern, I made two. The first one I made was knit just like the pattern asks, but the second one I decided to spice it up and make it a tad bit more challenging and add an eyelet lace repeat to the five stitches between the drop stitches. I recently got a request for this variation and decided that I would share my notes on how to add in the eyelet lace.

The lace pattern is essentially:
All odd rows: purl all stitches
Row 2: k1, k tbl, yo, ssk, k1, k tbl
Row 4: k1, k tbl, k1, yo, ssk, ktbl
Row 6: k1, k tbl, k2, yo, ssk

This stitch sequence is repeated through out the pattern. it creates an interesting effect with the biased drop stitches and with the eyelets lean in the knitting to the left the drop stitches run right to left. When you block the pattern the eyelets look as though they are running vertically because of the biasing.

Below I have inserted the lace pattern into the different sections of the Clapotis pattern where it is applicable, but you will still need to go print off and use the original pattern as all of the directions are not below.

Clapotis Variation : Eyelet Lace
Go to Knitty.com and print off a copy of the Clapotis pattern by Kate Gilbert
Start section 1, once you get to row 8 of section 1 you are going to start adding in the eyelet lace.
Row 8: Sl, yo, ssk, k1, k1 tbl, k1, k1 tbl yo, k2tog, kfb
Row 10: sl, k2, yo, k2tog, k1 tbl, k1, k1 tbl, k1, yo, ssk, kfb
Row 12: sl, k4, yo, k2tog, k1 tbl, k1, k1 tbl, k2, yo, ssk, kfb
Row 14: sl, k1, pm, yo, k2tog, yo, ssk, k1, k1 tbl, k1, k1 tbl, yo, k2tog, k1, ssk, pm, yo, kfb

Section 1 Complete

Section 2
Row 2: Sl1, k1, k tbl, [k1, k tbl, k1, yo, ssk, k tbl] to last marker, k1, k tbl, kfb
Row 4: Sl1, k2, k tbl, [k1, k tbl, k2, yo, ssk] to last marker, k1, k tbl, k1, kfb.
Row 6: Sl1, k3, k tbl, [k1, k tbl, yo, ssk, k1, k tbl] to last marker, k1, k tbl, k2, kfb.
Row 8: Sl1, k4, k tbl, [k1, k tbl, k1, yo, ssk k tbl] to last marker, k1, k tbl, k3, kfb.
Row 10: Sl1, k5, k tbl, [k1, k tbl, k2, yo, ssk] to last marker, k1, k tbl, k4, kfb.
Row 12: Sl1, k1, pm, yo, k2tog, yo, ssk, k1, k tbl, [k1, k tbl, yo, ssk, k1, k tbl] to last marker, k1, k tbl, yo, ssk, k1, ssk, pm, yo, kfb.
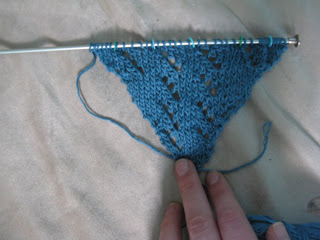
Section 2

Section 3
Row 2: P1, k2, k tbl, [k1, k tbl, k1, yo, ssk, k tbl] to last marker, k1, k tbl, k3, kfb.
Row 4: P1, k1, k tbl, [k1, k tbl, k2, yo, ssk] to last marker, k1, k tbl, k4, kfb.
Row 6: P1, k tbl, [k1, k tbl, yo, ssk, k1, k tbl] to last marker, k1, k tbl, yo, ssk, k1, ssk, pm, yo, kfb.
Row 8: P1, remove marker, drop next st, let it drop down several rows, pick up top bar with left needle to form a new st (make sure this st isn't twisted), k this and foll st tbl, k1, yo, ssk, k tbl, [k1, k tbl, k1, yo, ssk, k tbl] to last marker, k1, k tbl, kfb.
Row 10: P1, k3, yo, ssk, [k1, k tbl, k2, yo, ssk] to last marker, k1, k tbl, k1, kfb.
Row 12: P1, k3, k tbl, [k1, k tbl, yo, ssk, k1, k tbl] to last marker, k1, k tbl, k2, kfb.

Section 3, Now for the fun, you can see my two dropped stitches

Section 4
Row 2: P1, k2, k tbl, [k1, k tbl, k1, yo, ssk, k tbl] to last marker, k1, k tbl, k2, ssk.
Row 4: P1, k1, k tbl, [k1, k tbl, k2, yo, ssk] to last marker, k1, k tbl, k1, ssk.
Row 6: P1, k tbl, [k1, k tbl, yo, ssk, k1, k tbl] to last marker, k1, k tbl, ssk.
Row 8: P1, remove marker, drop next st, let it drop down several rows, pick up top bar with left needle to form a new st (make sure this st isn't twisted), k this and foll st tbl, k1, yo, ssk, k tbl, [k1, k tbl, k1, yo, ssk, k tbl] to last marker, drop next st and form new st as for previous dropped st, k this st tbl, ssk.
Row 10: P1, k3, yo, ssk, [k1, k tbl, k2, yo, ssk] to last marker, remove marker, ssk.
Row 12: P1, k3, k tbl, [k1, k tbl, yo, ssk, k1, k tbl] to last marker, k1, k tbl, k3, ssk.

Section 4, decreasing both sides

close up of lace sts and drop stitches

I hope that this is a fun variation for those Clapotis knitters out there. Good Luck!

Tuesday, November 16, 2010

A Question About Lace?

I am getting better still not 100% but defiantly feeling better than I have in the past few days. I'm dying more yarn today and am dreaming of a lace project.

This is odd for me as I am not a huge lace knitter. I like to use a little bit of my lace knowledge in my garment knitting on the edge of a top or as an inlay in sweater. I also must admit that I love fields of stockenette. Some knitters find it boring, but I love just knitting and purling, its easy and looks polished with some great construction details and a little bit of personality (hence my love of a well placed lace edging or panel). I can also work on a grament in stockenette and not have to be too conscious of what I am doing.

Maybe my lace project can be just that a lace project for a non lace knitter. I must admit I've only ever knit lace from one pattern and it was the Lace Ribbon Scarf from Knitty. As a knitter who knits lace or is interested in knitting lace what makes a good lace project?