A horriable virus has struck down my laptop. It is super sad and at the geek squad getting sorted out. Sadly, untill then I will not be able to post this week. Hopfully my computer will be fixed and back to me by the end of the week.
As soon as I get my laptop back I will finish the Beginner Guide to Knitting, along with a free pattern and some pics of my thrift store dress alterations.
P.S. I start Me-Made-June '11 tomorrow. Wish me luck! Once my lap top is back I plan on posting how I am doing and upload pics of what I'm wearing.
Tuesday, May 31, 2011

Friday, May 27, 2011
Me Made June '11
I'm going to do it, or at least try to do it. I just signed up for Me-Made-June '11 I am going to attempt to wear garments and or accessories made by me each day of June. I think I might have to chronicle my adventure here on Blue Betty. Here is my pledge to Me-Made-June '11:
'I, Amanda of bluebettyblog.blogspot.com, sign up as a participant of Me-Made-June '11. I endeavour to wear one accessory or garment made by me each day for the duration of June 2011'
If you are interested in participating or just want to read more about Me-Made-June '11 go check out Zoe's post on 'So Zo...What do you know'.
'I, Amanda of bluebettyblog.blogspot.com, sign up as a participant of Me-Made-June '11. I endeavour to wear one accessory or garment made by me each day for the duration of June 2011'
If you are interested in participating or just want to read more about Me-Made-June '11 go check out Zoe's post on 'So Zo...What do you know'.
Thursday, May 26, 2011
Dress Alteration

I found this "lovely" dress in the Fill a Bag for a Buck bin at my local thrift store. I pulled it out and saw that it had potential, good bones. in my bag it went with a few other items worth altering. It is three sizes to big, has a tea length skirt that was cut on the bias, pockets (one of my favorite features), giant shoulder pads and was a horrible faded carnation pink.
 Like I sad the shoulder pads were giant. They looked like something a preteen would use to stuff their training bra. Although I will give a little credit as they had lingerie straps sewn on to them.
  Out the came! And it was easy at it look liked the were only hand basted into the dress.
 Not only did it have shoulder pads it had underarm guards as well. This was my first encounter with the real thing, I had only heard and read about them till then.
  Next I took out the elastic which was so old it was deterioration as I patiently seam ripped. It had not spring left into and was leaving little white bits of hardened elastic all over the table, and me. It was a bit gross.
 I tried to take the sleeves and yoke off the dress with out cutting, but the way it was sewn together that would have taken me hours to do. I finally gave up my hopes of seam ripping and just cut the top to my specifications.
 To get rid of this horrendous pink I dyed the dress purple. This was a fiasco mostly because we do not have a stopper for out sink and i had to improvise by using a plastic container lid that fit just so over the drain. All in all though it worked.
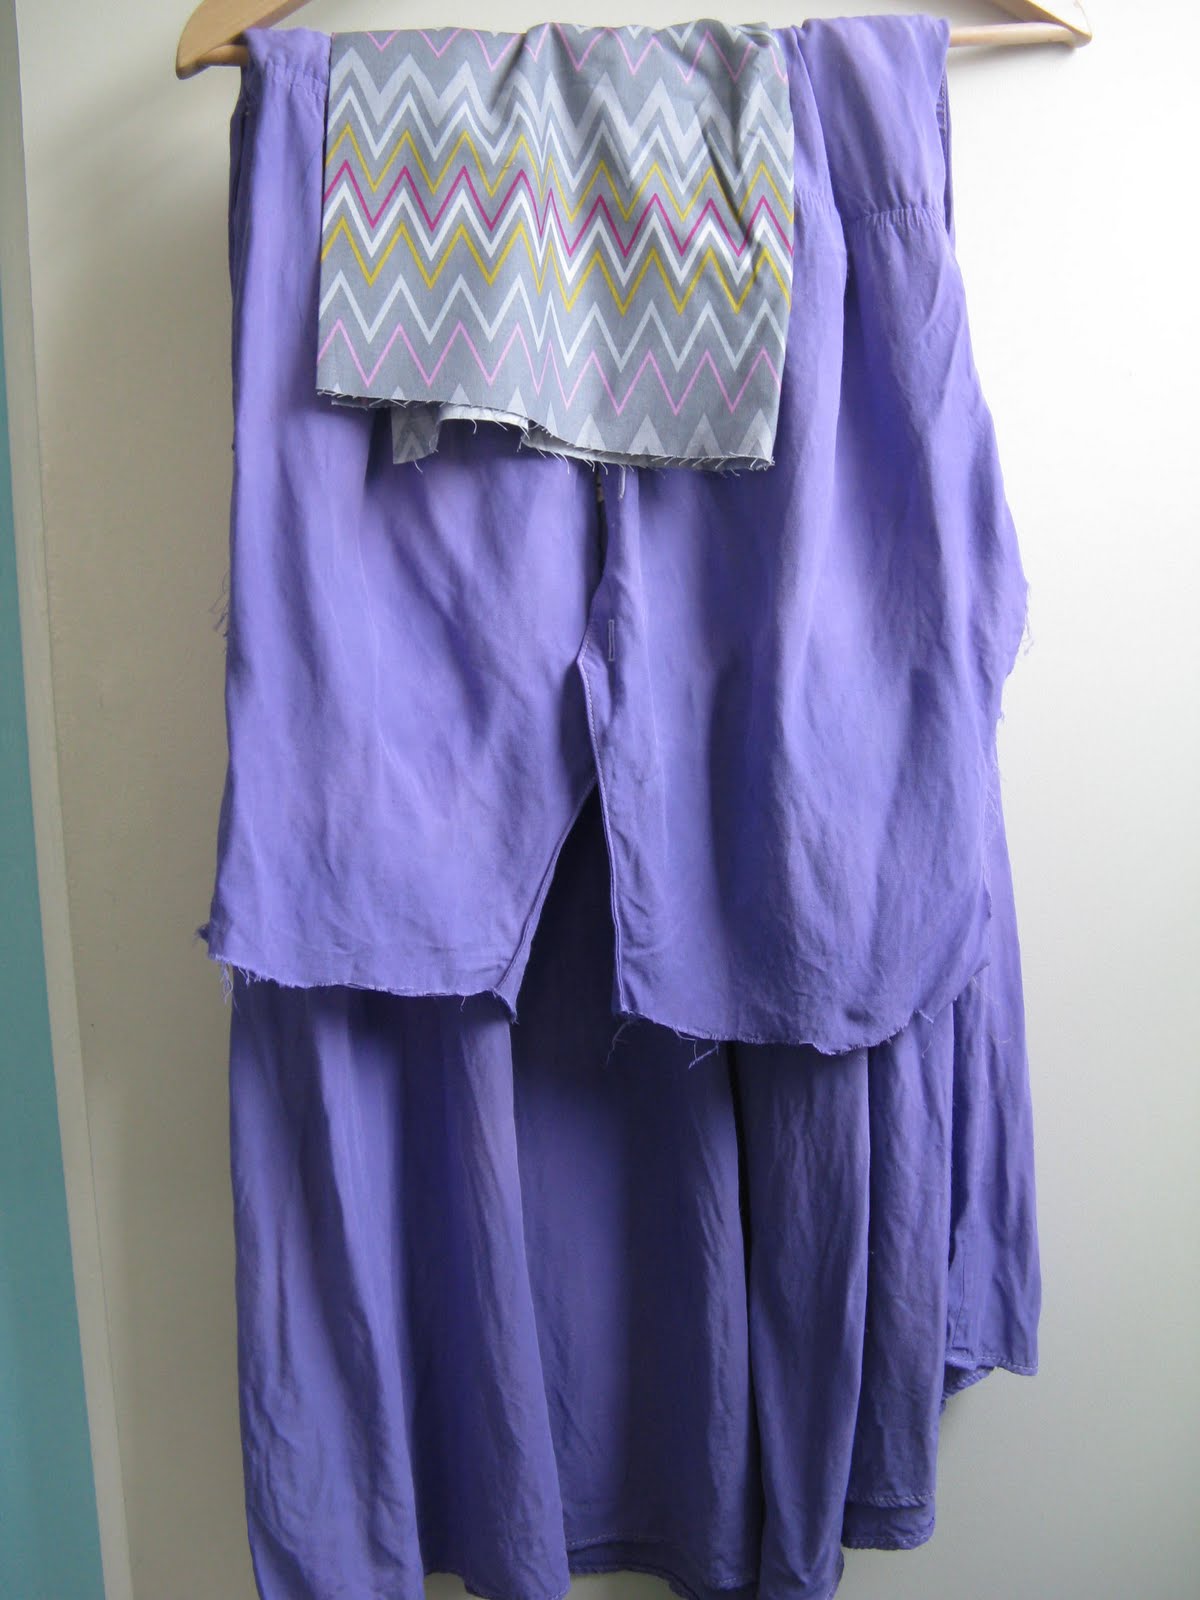 Here it is all dyed and ready to go. The fabric laying over it is going to become bias tape for the edges. I'm planing on having this finished today (fingers crossed). Simon and I have a party to go to on Saturday and I am hoping to wear my new dress.
Wednesday, May 25, 2011
Beginner Guide to Knitting Part IV: Knitting
Now that you have stitches on the needle its time to learn to knit! This is the fun part. In this guide I am going to show you the continental style of knitting. What this means is that you will hold your yarn in your left hand, and "pick" the yarn with your right hand needle. The other popular style is English knitting, where your yarn is held in you left hand and wrapped around the needle.
Hold the needle with your stitches in your left hand and your empty needle in your right hand. Wrap your yarn around your left index finger. Insert your right hand needle into the first stitch on your left hand needle. Insert your needle front to back from the left side of the loop, as seen in photo below.

Wrap yarn around right hand needle.

Pull wrapped yarn through stitch on left hand needle creating a loop on the right hand needle.

Slip loop off of left hand needle.
 There you have it the a knit stitch. Continue in this manner till there are no more stitches left on your needle. When you have done this you have completed one row of knitting. Switch you needles in your hands and begin your second row.
Beginner Garter Stitch Scarf
Garter stitch is the result of knitting all of your stitches on each row. Its a great way to become framiler with the knit stitch
Using the backwards loop cast on, Cast on 20 stitches
Knit all
continue knitting until your scarf measures 60" or desired length.
Bind Off (check back next Tuesday for a look at how to Bind Off)
Knitting Resources
Which Style Should You Learn?
Learn to knit: knit stitch, video tutorial
Knitting-Basic Knit Stitch (continental), video tutorial
Hold the needle with your stitches in your left hand and your empty needle in your right hand. Wrap your yarn around your left index finger. Insert your right hand needle into the first stitch on your left hand needle. Insert your needle front to back from the left side of the loop, as seen in photo below.

Wrap yarn around right hand needle.

Pull wrapped yarn through stitch on left hand needle creating a loop on the right hand needle.

Slip loop off of left hand needle.
 There you have it the a knit stitch. Continue in this manner till there are no more stitches left on your needle. When you have done this you have completed one row of knitting. Switch you needles in your hands and begin your second row.
 Beginner Garter Stitch Scarf
Garter stitch is the result of knitting all of your stitches on each row. Its a great way to become framiler with the knit stitch
Using the backwards loop cast on, Cast on 20 stitches
Knit all
continue knitting until your scarf measures 60" or desired length.
Bind Off (check back next Tuesday for a look at how to Bind Off)
Knitting Resources
Which Style Should You Learn?
Learn to knit: knit stitch, video tutorial
Knitting-Basic Knit Stitch (continental), video tutorial
Tuesday, May 24, 2011
Tuesday Techniques, Beginner Guide to Knitting Part III: Casting On
Now that you have your yarn and your needles it's time to learn how to cast on. There are many different ways to cast on but as a beginner you should try the backwards loop cast on. It is simple, easy to learn and it gets the job done.
First you will want to place a slip knot on your needle. If you do not know how to make a slip knot check out the tutorial on Wiki How.
Here is how it should look once your slip knot is on your needle:
 Next you want to take the live end of your yarn (the length of yarn that leads back to your ball of yarn) and wrap it around your index finger. As you can see in the picture below my live end is under the length of yarn coming off the needle.

Slip this needle up through the loop from underneath.

Now the easy part. Slip your index finger out of the loop and pull the loop tight around your needle.
 Make sure you don't pull your loop too tight. You want the stitched to be snug around the needle, but you want to make sure you can still slide the stitches along the needle and get your second needle into the loop with out difficulty.
Tomorrow we will learn how to knit and a simple project pattern. Go practice the backwards loop cast on. Below are some more resources for this type of cast on.
More Backwards Loop Cast On
Learn To Knit: Backwards Loop Cast On, a great video on how to execute this type of cast on.
Wiki How: How to Make a Slip Knot
Knitting Daily: Backwards loop cast on, short, sweet and to the point.
Knit Wiki: Backwards loop cast on
First you will want to place a slip knot on your needle. If you do not know how to make a slip knot check out the tutorial on Wiki How.
Here is how it should look once your slip knot is on your needle:
 Next you want to take the live end of your yarn (the length of yarn that leads back to your ball of yarn) and wrap it around your index finger. As you can see in the picture below my live end is under the length of yarn coming off the needle.
Slip this needle up through the loop from underneath.

Now the easy part. Slip your index finger out of the loop and pull the loop tight around your needle.
 Make sure you don't pull your loop too tight. You want the stitched to be snug around the needle, but you want to make sure you can still slide the stitches along the needle and get your second needle into the loop with out difficulty.
 Tomorrow we will learn how to knit and a simple project pattern. Go practice the backwards loop cast on. Below are some more resources for this type of cast on.
More Backwards Loop Cast On
Learn To Knit: Backwards Loop Cast On, a great video on how to execute this type of cast on.
Wiki How: How to Make a Slip Knot
Knitting Daily: Backwards loop cast on, short, sweet and to the point.
Knit Wiki: Backwards loop cast on
Monday, May 23, 2011
Weekend Update: Surfing and Such
We had our first surf on the Jersey shore yesterday and it was a good one! I should have brought my camera, because the waves were about knee to chest height and spilling. (A spilling wave is my favorite kind of wave.) I got to try my new board and well I love it! It was a good thing we went yesterday, the weather here in Philly has turned cold, cloudy and rainy. Just a good excuse to get knitting!
This week is going to be a busy one. I have to work on my design, and sew a dress or something to wear to a party on Saturday. Here are some of my fabric choices from my stash. I love them all, but am having a hard time trying to decide.
 I also have different amounts of each of these, so I can't just pick one dress or design and then pick a fabric. Each fabric choice would need a different project.
 This was my newest addition to my fabric stash, that I like being about to say is grown, but not out of hand just yet. I'm tempted to go back and buy more yardage I love this print so much. It's fiber content is 100% cotton, but this fabric has a nice drape and body without being too stiff.
 I also finished my sweater and actually wore it out the other day. I will have to get a picture of me next time I wear it. I swear it has buttons on it. The sleeves need a bit of elastic in the cuffs, but that's an easy fix.
This week is going to be a busy one. I have to work on my design, and sew a dress or something to wear to a party on Saturday. Here are some of my fabric choices from my stash. I love them all, but am having a hard time trying to decide.
 I also have different amounts of each of these, so I can't just pick one dress or design and then pick a fabric. Each fabric choice would need a different project.
 This was my newest addition to my fabric stash, that I like being about to say is grown, but not out of hand just yet. I'm tempted to go back and buy more yardage I love this print so much. It's fiber content is 100% cotton, but this fabric has a nice drape and body without being too stiff.
  I also finished my sweater and actually wore it out the other day. I will have to get a picture of me next time I wear it. I swear it has buttons on it. The sleeves need a bit of elastic in the cuffs, but that's an easy fix.
Friday, May 20, 2011
Beginner Guide to Knitting Part II: Needles
Once you have your yarn its time to figure out your needle situation.
If you are a beginner buying your first set of knitting needles can seem just as confusing as the wide world of yarn. There are so many types of needles, straight needles, circular needles, and double pointed needles. These are all made in just as many materials, wood, bamboo, steal, and acrylic. And these all come in sizes ranging from US 000000 to US 32. With so much variety it can make your head spin.
What Size?
If you were successful in finding a single ply worsted weight yarn you are going to need about a size US 8 to a US 10 needle. Checking your yarn's label is also helpful because there will be a suggested needle size printed there. These are usually pretty good recommendations.
Which type of needle?
I am a fan of the circular needle, but this is not important in your adventure to start knitting. Over time you will develop a preference for certain needles. As someone just starting out you should look for a pair of 9" straight needles. Straight needles come in longer sizes, but for a scarf you won't need the extra space of a longer needle and shorter needles are easier to wield.
What material should the needles be made out of?
Again over time you will develop a personal preference depending on how tight or loose you knit. But when you are just starting out give the bamboo a try. They are light, and smooth, strong, warm to the touch, and flexible. Bamboo is also renewable resource. (Did you know bamboo can grow up to 12 inches in one day!)
Once you fall in love with a yarn look for an appropriate sized pair of 9" bamboo straight needles and you will be ready for action. Just like buying yarn ask questions and let the employees know what you are looking for.
Needle Resources
Clover 9" Straight Needles
Knit Picks Harmony Straight Needles
Wiki How: How to Choose Knitting Needles
Blue Betty: Bamboo, Wood, Steal or Plastic
If you are a beginner buying your first set of knitting needles can seem just as confusing as the wide world of yarn. There are so many types of needles, straight needles, circular needles, and double pointed needles. These are all made in just as many materials, wood, bamboo, steal, and acrylic. And these all come in sizes ranging from US 000000 to US 32. With so much variety it can make your head spin.
What Size?
If you were successful in finding a single ply worsted weight yarn you are going to need about a size US 8 to a US 10 needle. Checking your yarn's label is also helpful because there will be a suggested needle size printed there. These are usually pretty good recommendations.
Which type of needle?
I am a fan of the circular needle, but this is not important in your adventure to start knitting. Over time you will develop a preference for certain needles. As someone just starting out you should look for a pair of 9" straight needles. Straight needles come in longer sizes, but for a scarf you won't need the extra space of a longer needle and shorter needles are easier to wield.
What material should the needles be made out of?
Again over time you will develop a personal preference depending on how tight or loose you knit. But when you are just starting out give the bamboo a try. They are light, and smooth, strong, warm to the touch, and flexible. Bamboo is also renewable resource. (Did you know bamboo can grow up to 12 inches in one day!)
Once you fall in love with a yarn look for an appropriate sized pair of 9" bamboo straight needles and you will be ready for action. Just like buying yarn ask questions and let the employees know what you are looking for.
Needle Resources
Clover 9" Straight Needles
Knit Picks Harmony Straight Needles
Wiki How: How to Choose Knitting Needles
Blue Betty: Bamboo, Wood, Steal or Plastic
Subscribe to:
Posts (Atom)