Tuesday, January 31, 2012
New Shelves
Simon and I live in a tiny apartment with no storage. We have been slowly, but surly fixing this with shelves and the use of vertical space. These puppies are the newest addition to the homestead. A bit bare right now, but soon all of my plants will be on the lower shelf and the drop ceiling and weight are the limit on the top shelf.
We purchased some simple boxes from Ikea for me to start storing my sewing stuff in. These two hold my patterns, all of my sewing notions and my growing collection of thread. I might need some more of these if I start to get serious about sewing.
The small section where the shelves overlap is where I have stuck my buddha and my small plants.
I accidentally started growing garlic and he is just so damn cute I kept him. He's starting to grow roots.
Because of our space issue a lot of things in our apartment have to do double duty. I sew at the kitchen table, our entertainment center also holds my stash of yarn and fabric, and things like that. Because I don't have the luxury of having a craft room, I'm trying to figure out how to store my project and sewing machine in a better way.
Any suggestions as to how to maximize space, keep my sewing/knitting stuff in order, while keeping my Husband sane?
Monday, January 30, 2012
Weekend In Photos
Here's what I did over the weekend.
Friday night, date night, we had dinner at Sabrina's and they had the best chalk board art ever!
Taught on Saturday, look at what my amazing students made. I love that they all used the same hat pattern and then customized it to fit there own style.
Later that night we went ice skating with our friends Mike and Jo on the River Rink in Center City.
I really want to drive the Zamboni. I'm sure it's not that exciting, but what they do is so cool.
Neither or us fell down!
Friday, January 27, 2012
Fiber Friday: Be My Valentine
I am bringing back Fiber Friday to Blue Betty Blog. It was one of my favorites and I hope it becomes one of your's. Today's Fiber is all from independent dyers and spinners found on Etsy, and to celebrate Valentines day here are some hanks, balls and skeins of yarn I wouldn't mind getting as a valentine.
1. A Funny Valentine Art Yarn
2. Steel Roses Hand Dyed Silk
3. Be Mine Handspun Art Yarn
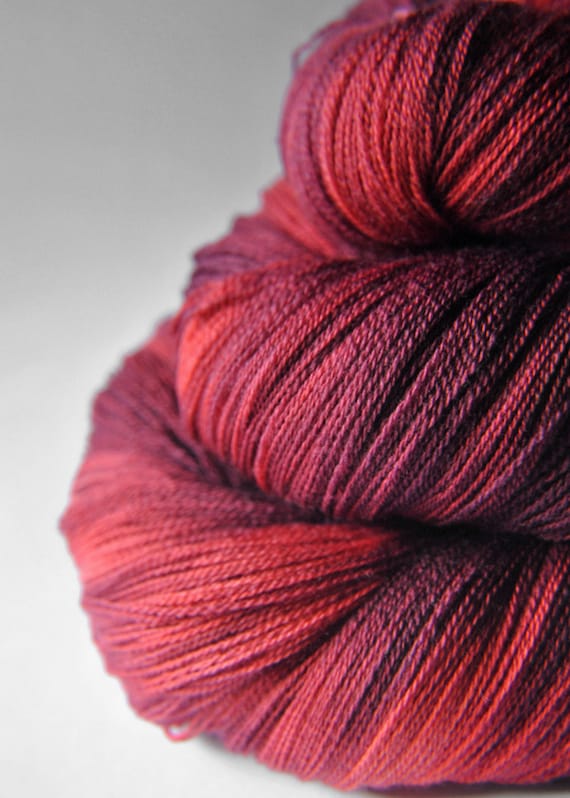
4. Bloody Valentine Merino Superwash Lace Weight
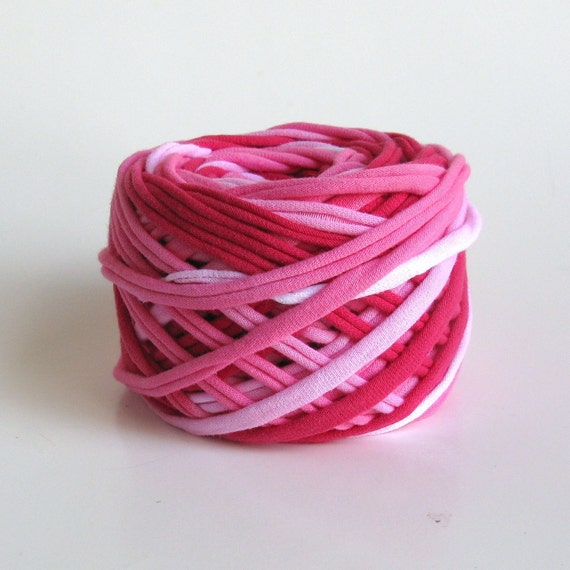
5. T-shirt Yarn, Valentine
1. A Funny Valentine Art Yarn
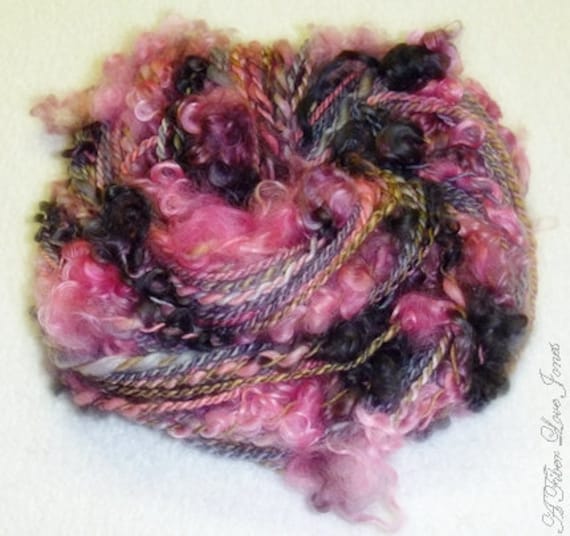 |
| AFiberLovesJones |
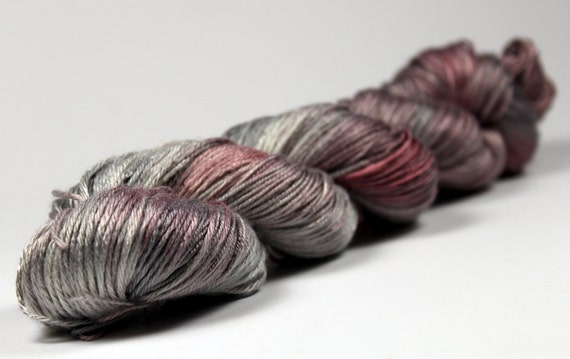 |
| Shunklies |
3. Be Mine Handspun Art Yarn
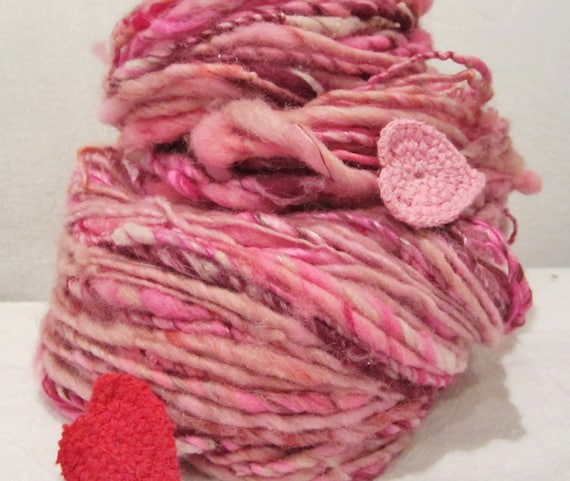 |
| SparkleShan |
4. Bloody Valentine Merino Superwash Lace Weight
 |
| Dyeforwool |
 |
| hoggwildfibers |
Labels:
Blue Betty,
etsy,
fiber,
Fiber Friday,
Valentines,
valentines day,
Yarn,
yarn etsy
Thursday, January 26, 2012
Coming out of Hibernation
This project has been hibernating, and today it's coming out of hibernation so I can finish it up. This little pile of yarn and needles and one finished item of the pair will be a lovely pair of lacy leg warmers. The pattern will be available on the blog as soon as I have finished knitting the second warmer. My second sock syndrome got the best of me with these puppies. I should have knit them two at a time, but I was all "no it will be fine I'll finish the first one then I'll cast right on for the second". I should have know better.
I do have to order another ball of yarn, but I have enough to start the second one. Here's to casting on to finish UFOs (unfinished objects).
Wednesday, January 25, 2012
Trousers
 |
| Burda Style Janina |
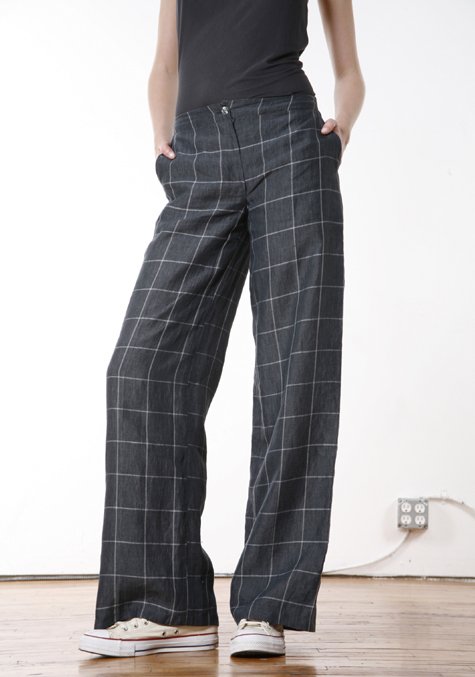
The pattern in the photo is Burda Style's Janina. The pattern has been sitting in my account for ages (almost a year), it's not a free patter, but it's only $3.00. Some of completed projects on the pattern page are awesome, and the construction looks pretty straight forward. The only cause for concern is the zipper, I've never made anything with a front lapped zipper. Guess it's time to stop fretting and just do it.
Labels:
Blue Betty,
pants,
Sewing,
sewing pants,
sewing project,
trousers
Tuesday, January 24, 2012
Beautiful Day
Monday, January 23, 2012
Knitting Updates
It's rainy and gloom outside today and it totally zaps all of my ambition. I did however get up and go to the Y, so that's a start.
Since today is starting to slip away from me I think it's going to be spent catching up on my knitting. I just finished the best mittens ever. The are knit out off super fine alpaca and lined with mohair and silk. They are super warm and will keep my hands toasty warm when the weather finally drops to a seasonably temperature.
This is a super easy mitten pattern, and they're fast. You can find it on Ravelry.com as a free PDF download it's called Delicious Mohair Lined Mittens. I lined mine in a fun contrasting color. It's like a secret surprise.
I also need to get knitting on some test knitting I'm doing for NoTwoSnowflakes. I'd love to blog more about it, but I'm sworn to secrecy. It's a really awesome project though and as soon as I can say more I will.
On top of test knitting I need to finishes this cardigan:
It's the never ending project, but I guess that's what I get for deciding to design and knit a garment in lace weight yarn. At least it's with size 6 needles. Don't worry I'm not that crazy, I would never knit this with size 2 needles.
I've started some swatching for spring patterns. Lots of garments are being designed and, fingers crossed, knit up for the spring on Blue Betty. I'm going to have to knit like the wind, but here's hoping for some pattern releases starting sometime in late February.
What projects are on your needles?
Labels:
Blue Betty,
Knitting,
knitting projects,
mittens,
swatching,
sweater,
sweater knitting
Friday, January 20, 2012
Link Love
It's time for January's link love and I've got ton's of great things I've found around the web.
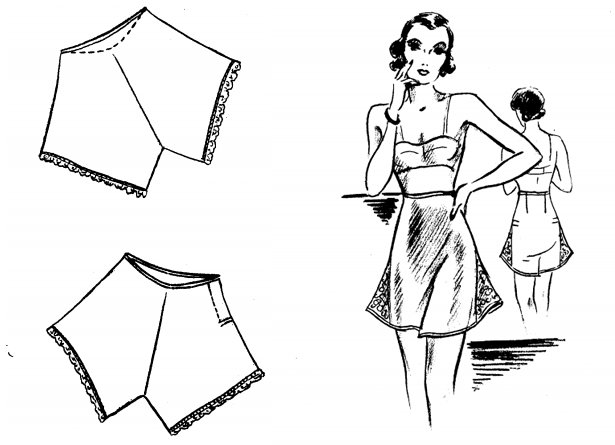
1.) Burda Style has a great blog post about sewing vintage undies.
2.) Learn how to turn a thrifted fur coat into a mounted jackalope over on Offbeat Home.
6.) Along the same lines as soup how about some hand chopped pesto cutesy of the Etsy Blog.
 |
| You Can Have Underwear That Fits! |
 |
| How to Make a Mounted Jackalope |
 |
| Floral Applique |
3.) Over on Coletterie you can read up on how to spice up a garment with some Floral Applique.
 |
| 5-Minute Heart |
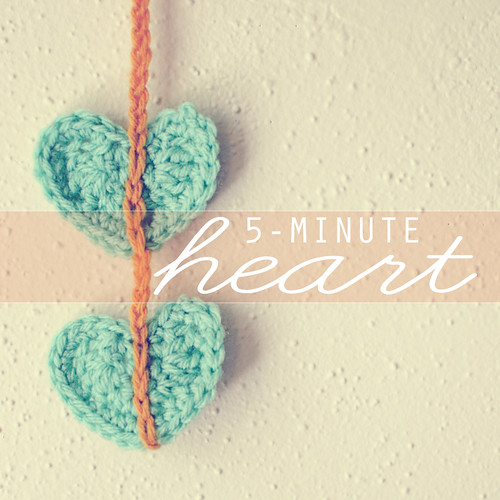
4.) Get ready for Valentines Day over on Good Knits and learn how to crochet a heart in 5 minuets.
 |
| Delightfully Tacky: Tortilla Soup |
5.) With winter finally here in the city it's time to warm up with some yummy soup. I'm going to try this yummy recipe from Delightfully Tacky.
 |
| Hand Chopped Pesto |
Thursday, January 19, 2012
Stitch Guide: Sea Foam
Sea Foam stitch is a great pattern if you have some beautiful yarn you want to show off. A hand spun or art yarn with inclusions would be showcased in the elongated stitches that make up the pattern. Simple to knit with an interesting visual impact this stitch is a great one to have in your arsenal.
Sea Foam (Knit Flat)
Multi of 8 plus 4
R1: K all
R2: K all
R3: *K4, YO twice, K, (YO 3 times, K) 2x, YO 2, K* K4
R4: K all stitches dropping the YO off the needle as you knit
R5: K all
R6: K all
R7: *YO twice, K, (YO 3 times, K) 2x, YO 2, K, K4* YO twice, K, (YO 3 times, K) 2x, YO 2, K
R8: K all stitches dropping the YO off the needle as you knit
Sea Foam (In the Round)
Multi of 8
R1: K all
R2: P all
R3: K4, YO twice, K, (YO 3 times, K) 2x, YO 2, K
R4: P all stitches dropping the YO off the needle as you knit
R5: K all
R6: P all
R7: YO twice, K, (YO 3 times, K) 2x, YO 2, K, K4
R8: P all stitches dropping the YO off the needle as you knit
Labels:
Blue Betty,
Knitting,
knitting stitch,
sea foam,
stitch,
stitch guide
Wednesday, January 18, 2012
Spring Sewing Plans
Now that I've finished my dress project I want to start looking ahead to spring and summer. I have also been inspired by the latest posts on Dixie DIY. They were about cataloging your wardrobe and looking for gaps and reasons why things don't get worn. You can read part I and part II.
Colette's Sobetto is deffinatly something I will be making in many different colors and prints. I may just have to learn to draft sleeves just so I can make a few fancy dress shirts.
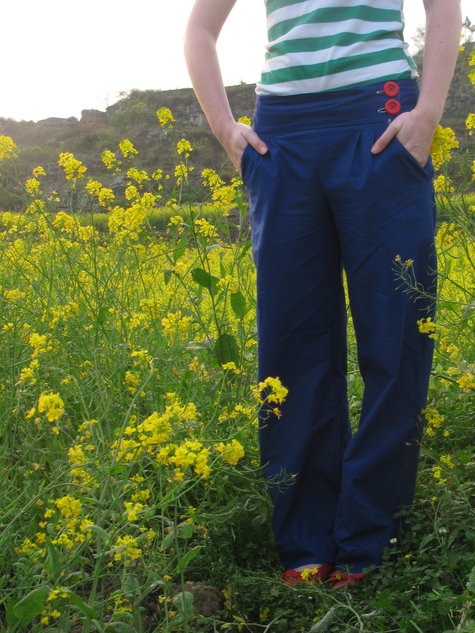
Pants are something I really want to tackle in the next few months. Especially wide leg sailor pants.
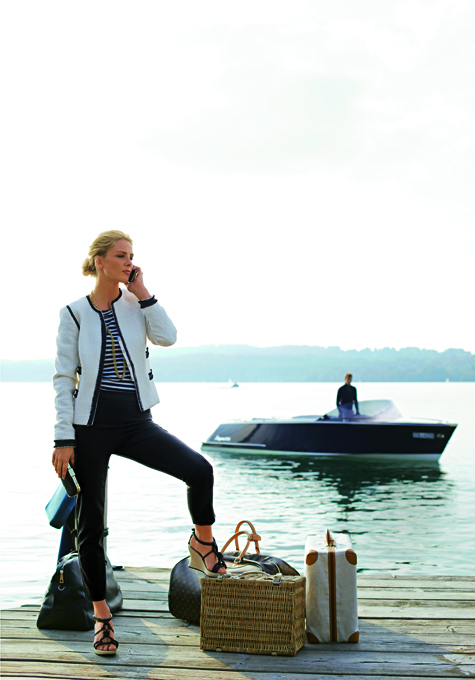
This Chanel inspired jacket makes me drool and want to tailor some more. These three projects could keep me busy for awhile.
I'm not sure if I want to go all fancy with spread sheets and categories about color and patter, but it would be great to get an idea of what I've got, what I don't wear, why I don't wear it, and what I need.
On the subject of sewing. I don't know if I need any of theses items, but I really want to make them.
 |
| Sorbetto, Coletterie |
 |
| Pantastic Sailor Digs |
 |
| Cropped Collarless Jacket |
Labels:
Blue Betty,
sewing projects,
spring,
spring sewing
Tuesday, January 17, 2012
Long Weekend
I'm back, well I was back yesterday from Jim Thorpe, but we still had our friends staying with us. It was a great long weekend with a lot of events. Our first event was a student of mine's Birthday. He was my student at the camp I worked at and lest summer he was old enough to come back and work on staff.
I got to see some friends that I hadn't seen in awhile and catch up with another one of my old students who goes to school in Boston. We had dinner at Bucca di Beppo.
We sat in the Pope room at the restaurant. There was a bust of the pope on a lazy susan in the center of the table. We played spin the pope a lot during dinner.
Other than all the pope pictures the food was yummy and the company was great.
Then on Saturday our friends from Boston came down for our friends wedding in Jim Thorpe. It was great to see them and Simon and I were excited to spend time with them.
The wedding was beautiful and the food was amazing. It was from the catering company that uses all local produce and meat. They had the best crab cakes I have ever eaten in my life. The reception is where I took most of the pictures.
The bride's dress was beautiful and almost like a sculpture with all the draping and crinolines. It was reminiscent of butter cream frosting. (Oh, by the way the cake was amazing!)
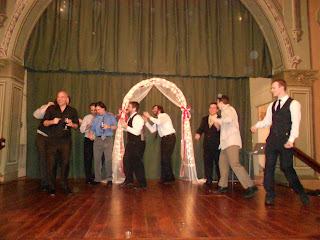
This photo has a great story. Our friend Josh was the DJ and he played raining men and all the guys we are friends with got up and danced on the small stage in the reception hall. It was hilarious.
It was a great party. I was so caught up with all the fun I forgot to have Simon take a picture of my dress. I will have to have a photo shoot or see if any of my friends have on of me wearing my dress. (The dress came out perfect and it fit like a dream!)
Now I am looking forward to sitting around on in my living room, watching some netflix and knitting.
Labels:
Birthday,
Blue Betty,
wedding,
wedding guest dress
Friday, January 13, 2012
For The Love of Philly: Pennsylvania Fabric Outlet
This is my favorite shop in Philly to buy fabric and buttons. They have a huge selection of fashion fabrics, cottons, linen, wool, practically everything. One of the best things too is it's an outlet which sells close out so the prices are half in not more off the original. It's one down fall is that if you see something you like you should snap it up while you are there, because who knows if it's going to be there when you go back. Since the fabrics are close out they can't order you more.
What I like about this shop is that it is easily navigated. Unlike a lot of shops in fabric row you are able to explore and see all the wonderful goodies in stock. Stock is neatly displayed on shelves and racks and hung up on walls. It's not fancy, but it's not messy. The staff is helpful and if you can't find something they will probably know right where it is.
Not only is there a huge selection of fabric there is also a wall full of buttons and other hardware. Also in the way back of the shop (not pictured) there are all types of zippers, trims, lace, cording, pipping, and elastic. They also stock feathers and sequence and leather.
The shop is located on South 4th St. Just a few store fronts past Fitzwater St. The hours are not posted in the store, but they are open everyday except Sundays to my knowledge and close around 5:30 on most days. This is vague and not too helpful, but every time I have made a trip to this shop it has been open. If you are looking for fabric I say stop here first.
Thursday, January 12, 2012
Wedding Guest Dress Part IV
I am in the home stretch of this dress project. The midriff section is attached, gathers and all.
I tried a new way to sew my gathers and really liked it. To accomplish this you sew two lines of basting stitches between your marks. Then using your sewing machine set at the widest stitch setting, sew two parallel seams. Then when it's time to gather the section you just pulled on the bobbin threads to pull the fabric in.
It needs a good pressing, but in time. There is still much more to do before a final steam is in order.
I also basted the skirt and the lining together. Mostly to make my life easier. This fabric is slippery and slides around quite a bit using a ridiculous amount of pins help but so does basting.
Once everything was attached I pinned the midriff lining down to the skirt lining. There will be some serious blind stitch going on there.
All the pieces are sewn and now its just a lot of finishing work, but I have a few more days and not too much to do. Here is what is left to do on the dress:
1. Blind stitch the midriff lining to the skirt lining
2. Set in the zipper
3. Slip Stitch the facing to the lining
4. Hem the skirts.
Not to bad. I plan on sewing the midriff and the zipper today and that leaves me just the hem and the facing for tomorrow.
Labels:
Blue Betty,
dress making,
Sewing,
sewing project,
wedding guest dress
Wednesday, January 11, 2012
Wedding Guest Dress Part III
I am making head way on my dress and have completed what I consider one of the hardest parts of the construction of this dress the bodice. Now there are a lot more complicated bodices out there in the world, but this one is fully lined and I decided to sew in a facing so that the edges looked clean and were the same color fabric as the dress. There is a great tutorial on Burda Style that shows you how to Sew an All-In-One Facing. This is the method I used to sew my bodice together.
First I hand basted my lining and my fashion fabric together. This part allowed me to catch up on some TV on Hulu, but that's where the easy ended.
Next I sewed the facing to the bodice with right sides facing. Following the directions on the tutorial from Burda Style I left about two inches un-stitched from the top of my straps. Trim your seam allowances to reduce bulk and under stitch the neckline and under the arms. This will help the facing and the seam allowance stay to the inside.
This is the tricky part that involves you being very careful and aware of what is going on with your pattern. You have to turn the front straps right side out while leaving the back straps inside out. Make sure you read through the tutorial before you start and have it bookmarked or open in a window while you work so you can reference it. But this is where the magic of this technique starts to happen.
Following the tutorial I then sewed the back facing to the front facing and did the same with the bodice pieces. This is a bit weird since one strap is inside our the other and I suggest taking your time and a quiet part of the day so you don't rush through this part.
Once sewn your piece will look something like this. Press the seam as best you can. I had a bit of trouble with my facing not lining up right with the bodice piece. I had too much fabric some how on the facing. After some seam ripping and re-stitching I was able to get rid of the excess and get my top shoulder seams to line up.
During this section I had to be mindful of a few things:
1. Make sure not to sew through the strap that is inside. I was only sewing through 3 layers of fabric at all times (fashion fabric, lining, and the facing). Or this was going to end in disaster.
2. Make sure I started my seams about a 1/4 inch from before my first facing seams ended
3. Watch my seam allowance.
Here is the finished seam. This is of the lining side as there is more contrast and you can see the seams better. Press the seam allowances. Now is the part with the magic! Turn everything right side out!
And there you have it! An all in one facing! This is a great technique and the tutorial on Burda style explains it wonderfully with lots of pictures and descriptions. I'll be putting this one in my sewing tool box.
Labels:
all in one facing,
Blue Betty,
Dress,
Sewing,
sewing project,
wedding guest dress
Subscribe to:
Posts (Atom)


